Resolving Amazon Macie’s “A job with the name … has already been submitted with a different ‘clientToken’” Error

In doing some with with Amazon Macie and Terraform, I ran into this error message:

EXEC : error : creating Macie ClassificationJob: ResourceInUseException: A job with the name ‘Redacted Job Name’ has already been submitted with a different ‘clientToken’ [c:\src\redacted\path]
         status code: 400

This isn’t a very clear error for what’s really happening.  Macie jobs are immutable—you can’t change any property of a job, including the description (although you can update the job_status but you may be ignored based on the schedule).  Instead, to make whatever change you’re trying to make, you have to create a new job with a slightly different name, and disable the old job.

Per AWS’s documentation at https://docs.aws.amazon.com/macie/latest/APIReference/jobs.html

Note that you can’t change any settings for a job after you create it. This helps to ensure that you have an immutable history of sensitive data findings and discovery results for data privacy and protection audits or investigations that you perform.

Terraform is stateful, but complies with the AWS API, so changing the name of the job creates a new one instead of updating an existing job’s name.  Be careful of typos (or so I’ve been told…).

Installing ASP.NET Core Identity in PostgreSQL

It’s “one of those days” project time!  I want to run an ASP.NET Core site on AWS, using ASP.NET Core Identity provider for user AuthN/AuthZ.  ASP.NET Core Identity has enough features to get started, can be extended, and is free.  The most common back-end for Identity is SQL Server, but I want to use a managed database like PostgreSQL instead, because I don’t want to be a DBA this time.  Fortunately, switching from SQL Server to PostgreSQL is a simple but not well known.

Although you can add Identity at any time during development, you really want to install and configure Identity preferably before you do anything else, since an EF Core migration is involved.  It’ll also set a better baseline in your git history.

(Note: this is an updated and expanded post, based on https://stackoverflow.com/questions/65970582/how-to-create-a-postgres-identity-database-for-use-with-asp-net-core-with-dotnet.  A few things have changed since that answer was posted, and additional explanation may be helpful also.)

Step 1: Create the database (use your database IDE)

A. Create a database user, with a password and login permissions.

B. Create your Identity database, and assign user as owner of the database.  For the DDL will need  lot of permissions, but can configure a least privileged user later.

Step 2: Create your site and install Identity

Create an ASP.NET Core site with Individual Identity selected.

image

If you have a site already without Identity, you can scaffold it, per https://learn.microsoft.com/en-us/aspnet/core/security/authentication/scaffold-identity.

If you create a site with Individual Identity, the DbContext and UserContext are created for you; if you scaffold in later, you’ll just have to add these yourself.

This is a good time to commit to git, in case you need to revert anything we do in the next steps.  Or so I’ve been told…

In appsettings.json, set the DefaultConnection to your PostgreSQL instance.  For dev, I’m running it in Docker so my string looks like this:

Host=localhost:5432;Username=wombat_user;Password=w0mb@t;Database=wombat_identity

Step 3: Configure the Nuget packages

First, delete the Sqlite package.  We don’t need this anymore.

image

Next, install the latest version of these packages

image

Finally, set the database provider in Program.cs.  Around line 10 you’ll see the AddDbContext line.  Change UseSqlServer (or UseSqlite) to UseNpgsql and save the file.

Step 4: Run the EF Migrations

If you need to, install and enable EF Migrations:

dotnet tool install –global dotnet-ef

First, clean up any cruft from the default installation:

dotnet ef migrations remove

Now, create a migration for PostgreSQL

dotnet ef migrations add {a good migration name}

Then, apply the migration.

dotnet ef database update

You should now see all the database objects for ASP.NET identity in your database.

If you threw an error, especially about casting TwoFactorAuth to a boolean, you probably need to re-remove the migrations and try again.  This worked for me.

This is an excellent time to commit to git.

The Identity pages live in a magic component and just work.  If you plan on extending Identity, or just want the pages in your solution, you can scaffold the pages by right-clicking on the project, choose Add >> Scaffolded Item >> Identity.  You’ll be prompted to choose the database context, and then all the pages will be added to your solution.  Details on this can be found at https://learn.microsoft.com/en-us/aspnet/core/security/authentication/scaffold-identity?view=aspnetcore-7.0&tabs=visual-studio#scaffold-identity-into-a-razor-project-with-authorization.

At this point, my test site is running fine.  It’s possible we’ll hit a snag in some of the more advanced capabilities, so there may be more blog posts to come.

Transferring a Domain from Google Domains to Cloudflare

To no one’s surprise, Google has killed yet another popular service.  To the dismay of many, that service was Google Domains; see https://9to5google.com/2023/06/15/google-domains-squarespace/.  Google Domains was popular because it was inexpensive, simple to manage, no-frills, no-BS.  Google Domains did not charge extra for private WHOIS, which kept us from getting offers to submit our domain to over 300 search engines, or fake “renewal” scams.  This made it great for all those projects “I’ll get to one day”.  No communication was sent by either Google or Squarespace, everyone found out via news stories.  The news broke on June 15, I registered domains on June 12 and there was no indication of a sale.  Since Squarespace’s prices are almost 2x what Google Domains charges, and its business model is selling website builders, this has left a lot of people looking for a good alternative.  Cloudflare gets mentioned because of its price and trust in the technical community.

image

Since a few of my domains are actually live and pointing to things being used, the prospect of switching a registrar brings a little nervousness.  It’s just DNS, nothing ever happens because of that…  Fortunately, I have a few domains for projects I’ll get to one day, so I can test with those.

I recommend doing this with two browser windows open, one for Cloudflare and one for Google Domains, since there is a little back-and-forth.

Step 0: Prechecks!  Can you transfer your domain?  Do you have a Cloudflare account?

The first thing to note is, you can’t transfer a domain within 60 days of registration (this is an ICANN rule).  Also, your registration needs to be more than 15 days from expiration, so start the process before then or you’ll need to renew, then transfer.  Cloudflare also does not support all the extensions Google does, notably .dev (although they are working in supporting .dev, and should be ready by the end of the summer).  I did not check .zip.

You’ll need a Cloudflare account.  If you don’t have one, create an account and make sure you do the email verification.  You can’t transfer a domain to Cloudflare until you have verified your email.  This took me less than 5 minutes overall.

As part of the process, you need to change your nameservers to Cloudflare.  This involves DNS propagation and make take up to 24 hours.  I have a couple side things on shared hosting, and am using their nameservers, so this is the part which worries me the most.  If you’re using a shared host’s nameservers, check their documentation before switching anything, to make sure you don’t need some extra configuration in the host’s setup also.

Cloudflare’s documentation for transferring is at https://developers.cloudflare.com/registrar/get-started/transfer-domain-to-cloudflare/.

Several of my domains are used only to forward traffic to a far less glamorous URL, usually a registration site for an event, which I have to change 3-4 times per year.  Cloudflare does support URL forwarding, not as elegantly as Google Domains. You can set this up after my Step 2 below.  Cloudflare’s documentation is at https://developers.cloudflare.com/support/page-rules/configuring-url-forwarding-or-redirects-with-page-rules/.  That being said, I’d do a transfer between events when the forwarding URL isn’t being used.

Step 1: Unlocking Domains in Google Domains

Log into Google Domains, select the domain you want to transfer, click on Registration Settings, then scroll down to the Domain Registration section.  By default, Google locked domains from being transferred, so you need to unlock it.  In a future step you’ll need a transfer code, this is also where you find that.

image

Step 2: Transfer DNS to Cloudflare

Before you transfer the domain registration, you first transfer DNS to Cloudflare.  Log into your account, and on the Websites page, click one of the “Add site” buttons.  This will start the setup process.

image

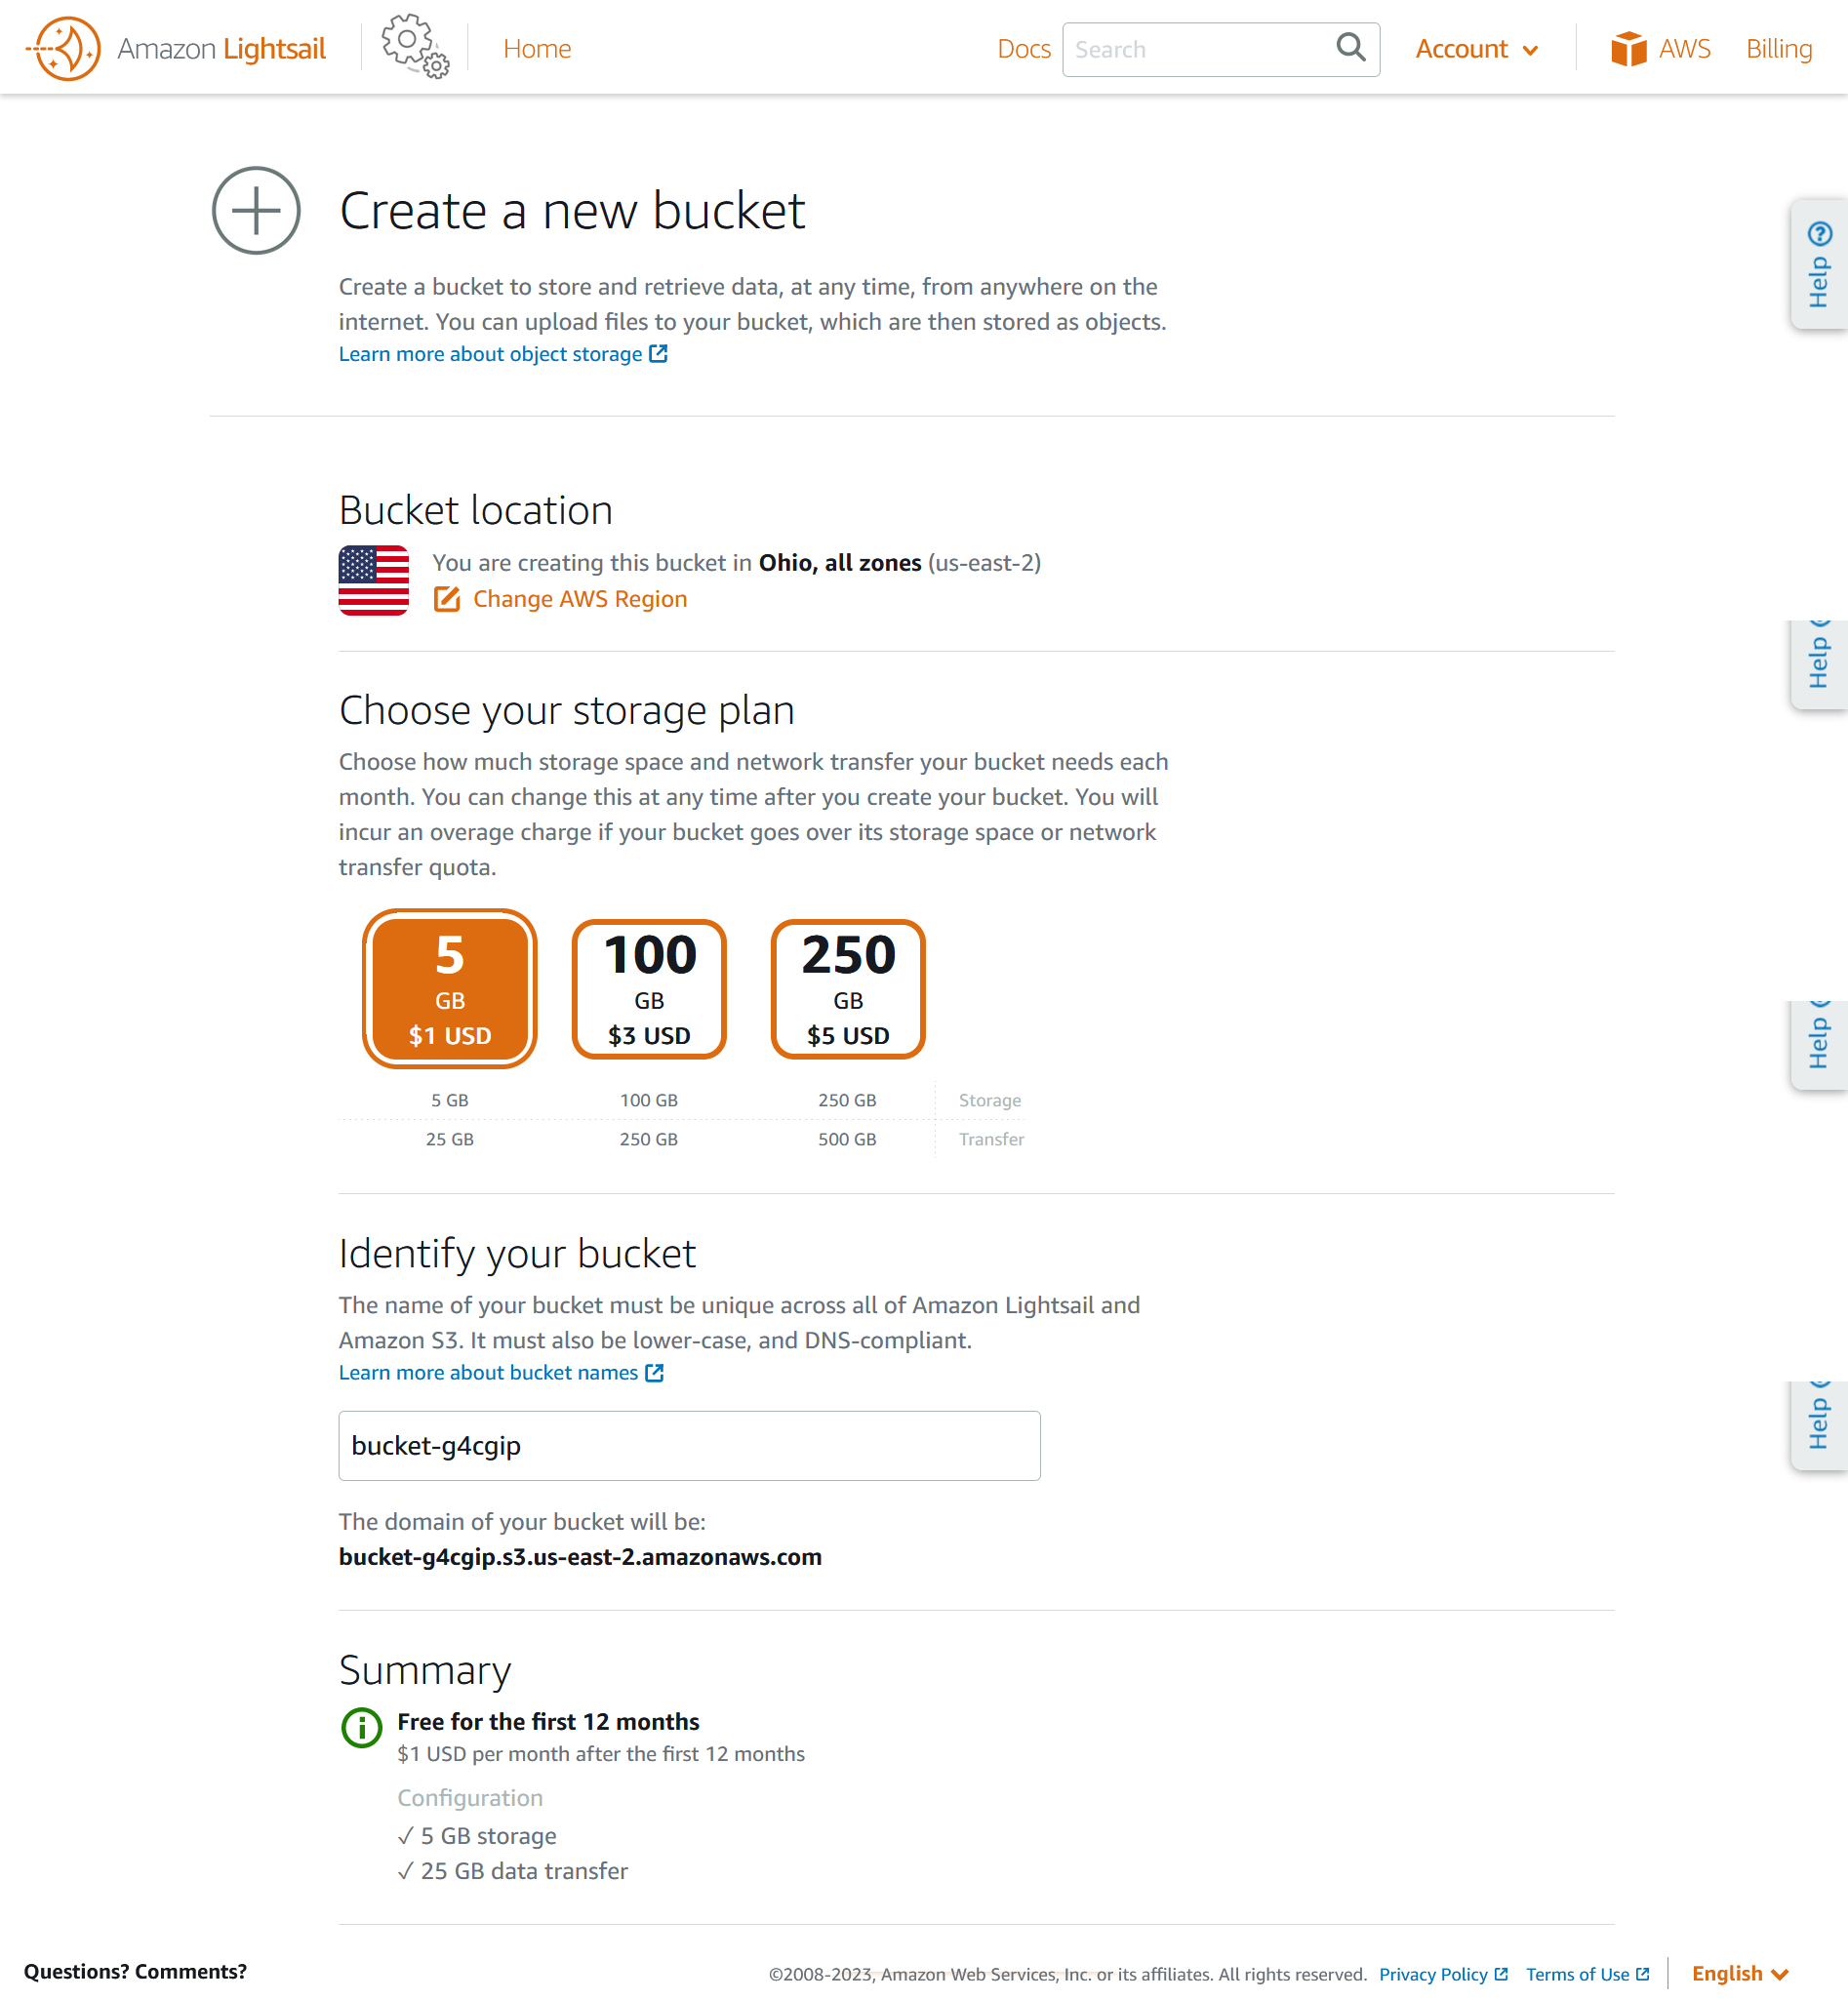
The first step is to choose the DNS plan we want to use.  I love places that have free plans for all my hobby projects, so that’s what I’m starting with.

image

IMPORTANT!!  Cloudflare then scans your domain’s DNS entries and gives you an opportunity to confirm them.  It’s a good idea to compare the imported records to your configuration.  You can also add records, so this is a good time to add a DKIM since GMail is starting to check those (see https://support.google.com/a/answer/174124?hl=en).

image

As I said above, this is where you actually transfer DNS to Cloudflare’s nameservers.  If you’re on a shared host, double check if you need any additional configuration in your website host when using external nameservers.  Bare minimum you’ll need to visit your host to switch the nameserver list.

image

If you’re using your domain to forward traffic to another URL, you can now set up the forwarding in Cloudflare to hopefully avoid traffic interruptions.  Cloudflare’s documentation is at https://developers.cloudflare.com/support/page-rules/configuring-url-forwarding-or-redirects-with-page-rules/.

Step 3: Switch Nameservers

If you’re using Google’s nameservers, go back to Google Domains and visit the DNS page.  There is an almost invisible set of tabs at the top of the page, you need to click “Custom name servers”.

image

Add the nameservers Cloudflare told you to use, and click the “Switch to these settings” link in the yellow alert bar.

image

Once you see this, you’re done.

image

Google’s documentation for this process is at https://support.google.com/domains/answer/3290309.

Every shared host has a different control panel, so you’re kind of on your own for this part.  Look up their docs.

Step 4: Turn Off DNSSEC

Regardless of whose nameservers you’re using, you need to turn off DNSSEC.  This is back in Google Domains, on the DNS page.

image

Click “Unpublish records” and you’re done with that.

image

Step 5: Check Nameservers (and wait, probably)

Go back to Cloudflare and click the “Check nameservers” button, and wait for the confirmation email.  Despite the note that it may take a few hours, it only took about 10 minutes.

image

Step 6: While You Wait, Check Payment Info

While we’re waiting, check your payment information.  If you set up a new account (like I did), you need to have a valid credit card on file in order to transfer a domain.  There is a transfer fee, but this also adds a year to your registration (with some exceptions, read the page).

image

Step 7: Initiate Transfer

After you receive your confirmation email that the nameservers have been updated, log back in to Google Domains and Cloudflare.  In Cloudflare, go to Domain Registration >> Transfer Domains, and select the domain you want to transfer, then click Confirm Domains.

image

Go back to Google Domains, and perform the following steps:

If you did not unlock the domain earlier, go to Registration Settings and turn off the domain lock.

image

Get the auth code.  You’ll have to re-authenticate to Google, and the code will be in a popup window. 

image

Copy the transfer code and paste it into the box in Cloudflare.

image

Add your registration details, and click the “Confirm and Finalize Transfer” button.  These might be auto-filled if you turned off Privacy Protection, but I wasn’t going to risk exposing my contact information to  DNS harvester bot.

image

In addition to the confirmation page, Cloudflare will send you an email confirming your intent and that you have been charged.

image

Within a few minutes, Google Domains will send an email for you to approve the transfer.  Click that button to open a pop-up in Google Domains, then click the Transfer link.

image

image

A few minutes later, you’ll get an email from Cloudflare confirming the transfer is complete.

image

Step 8: Turn DNSSEC Back On

In Cloudflare, choose your domain from the list of Websites, then go to DNS >> Settings, and click the Enable DNSSEC button.

Side Project Chronicles, ep. 4: CLI/SDK

tl;dr

This post got a little long, so here are the learnings:

  1. Any of the AWS SDKs, including boto3, as well as commercial IaC, all have Lightsail libraries.
  2. The user id and user secret created in Lightsail do not have console access, so to use an SDK you need to create a user via the regular IAM.
  3. Lightsail libraries in SDKs are limited to only the functionality of the Lightsail console.
  4. Lightsail S3 buckets do not appear in the ListBuckets results from regular S3 components in the SDKs, but can be addressed directly using a regular S3 library if you know the bucket name.
  5. When using a regular S3 library, the functionality is again limited to what Lightsail supports; attempting an unsupported action returns “Access Denied” exception.
  6. The async .NET SDKs for .NET 5+ do not implement all the methods found in the full .NET Framework versions.  I switched to boto3 and Python rather than install .NET 4.x to test ListBuckets and similar actions; see #4 for how that worked out.

The Full Adventure

The Lightsail console provides us a lot of functionality, but it’s not easy to audit the changes we make using the console.  The console is a manual process and we have to remember to always check the same settings; hence why IaC is a best practice.  Based on our look at the S3 bucket, we know more is happening via Lightsail than we can see, and we assume good decisions are being made.  Something specific I’d like to check is if objects are encrypted at rest.  Since a lot of automated compliance tooling uses the API or and SDK to check adherence to enterprise rules, we want to make sure we can use these to access the settings we’re interested in.  As it turns out we have a number of options for SDK/CLI/IaC for Lightsail:

(SDKs are also available for several languages other than .NET)

I want to try the AWS SDK for .NET, since that’s my most native programming language.  The AWS SDK specifically for Lightsail is available via Nuget, which describes Lightsail as “[a]n extremely simplified VM creation and management service.”  Despite that outdated description, the SDK is current.

The Lightsail S3 buckets were not visible in the usual S3 console, so I wanted to see if they are visible to the CLI or SDK.  AWS has an example of how to list buckets with the SDK, at https://github.com/awsdocs/aws-doc-sdk-examples/blob/main/dotnetv3/S3/ListBucketsExample/ListBuckets.cs

As it turns out, the bucket access keys we created in the Lightsail console do not grant permissions to use CLI/SDK.  This is one instance where we need to use the normal AWS control panel rather than the Lightsail control panel, and create an IAM user with more privileged  permissions (https://lightsail.aws.amazon.com/ls/docs/en_us/articles/amazon-lightsail-bucket-management-policies).

With a more privileged set of user credentials in place, we can run the AWS sample, and see that the Lightsail buckets are not listed in the response.  That makes sense, since we didn’t see them in the API, but it’s good to check.

If we know the name of the bucket, we can access it directly, but the actions we can perform are limited.  It was at this point I realized not all functions in the .NET Framework version have been implemented in the .NET version; instead of installing .NET 4.x, I switched to python boto3.  What I found is, when using a regular S3 library, the you can list_objects but not get_bucket_encryption.  Get_bucket_encryption returns an Access Denied error, even when using secrets for the root user.

To wrap this all up, you can use either a Lightsail SDK, or a regular S3 SDK, to work with Lightsail buckets.  Either way, functionality is limited to what Lightsail supports.  You’ll just have to take it on faith that AWS’ defaults are secure enough for your needs.  It’s unlikely policy scanning tools can detect or validate best practices on your Lightsail buckets.

Side Project Chronicles, ep. 3: Lightsail Bucket Storage

In ep. 2 we briefly looked at the Lightsail control panel and saw that we can create Bucket Storage. In this post, we’ll look deeper into Lightsail Bucket Storage.

To create a new bucket, we first choose a region, storage plan, and name the bucket. Since Lightsail is not available in all regions, there is a shorter list of regions to choose from than regular S3. As with S3, bucket names must be globally unique.


Once the bucket is created, we’re taken to a bucket management page with several tabs. The Getting Started tab welcomes us and guides us to some documentation for important settings.

The Objects tab lists the folders and objects in our bucket, and the properties of any we selected. To add objects, we can upload an entire directory or a single file. We can also drag and drop instead using an upload dialog. Selecting an uploaded object shows the permissions, in addition to the size, type, tags and versions. Object tags can be set here also.

By default, Lightsail buckets are private, and objects inherit these permissions. Private buckets can still be accessed from instances we attach, as well as services and applications which can use access keys. Access keys are created on this tab, and cross-account access is also configured here.

The Metrics tab displays the storage consumption, a graph of storage growth, and set alarms in case we get too close to our limits. Since Lightsail buckets do not appear in S3, their metrics do not appear in CloudWatch metrics.

The Versioning tab is where we turn on versioning for objects stored in the bucket. Every version counts against the storage limit, so this is something to enable only if it’s needed, and if we have an alarm set.

We configure CloudWatch-like logs using the Logging tab. Since Lightsail buckets are not part of regular S3, their logs do not appear in CloudWatch. Instead, logs must be stored in a Lightsail bucket in the same account (see https://lightsail.aws.amazon.com/ls/docs/en_us/articles/amazon-lightsail-bucket-access-logs). This can be the same bucket as our objects, or a different bucket. It may take a couple hours for logs to appear, but once logs appear, we can download logs for analysis. There may be as little as 1 entry per file and look like CloudWatch formatted. It’s not very convenient to read or analyze logs in this fashion but it doesn’t look like there is a better option at this time. If you want to monitor access patterns it looks like you’ll need to implement logging in your web application and keep the bucket completely locked down.

Since Lightsail Bucket Storage is based on S3, what do we see if we look at S3 console? As it turns out, Lightsail buckets are not available via the S3 console. This means we have to manage buckets via the Lightsail CLI, or an application like S3 Drive, for which we’ll need access keys created in the Permissions tab. Using S3 Drive we can interact with S3 just like any other removable storage, so we can transfer files and open them directly.

Lightsail Bucket Storage simplifies S3 and seems to have good security defaults, but the limited size and lack of CloudWatch make it suitable only for hosting web assets.

Series Contents

Side Project Chronicles, ep. 1: Hosting

Side Project Chronicles, ep. 2: Tour of the Lightsail Control Panel

Side Project Chronicles, ep. 3: Lightsail Bucket Storage (this post)

Side Project Chronicles, ep. 2: Tour of the Lightsail Control Panel

I apologize in advance, this is going to be a long post because of the screenshots. When I explore an AWS service, I like to look through the control panel to get an idea of what settings are important and available. This helps me learn the IaC options too. You don’t incur any charges just poking around the control panel, either, so it’s a good practice for any service.

The first thing you notice is how very different the Lightsail control panel is from the rest of AWS. It greets you like a wizard, and has a decidedly non-AWS UI. Lightsail services are their own distinct offering, but are built on top of other AWs services. This means that although the object storage is built on top of S3, the access to uour buckets should be through Lightsail endpoints and the billing is Lightsail pricing.

Clicking through the welcoming robot screen for the first time, you’re greeted with a page which has several tabs–Instances, Containers, Databases, Networking, Storage, Domains & DNS and Snapshots. I’ll talk about each of these tabs and the top-level options for these below. In later posts I’ll examine some of the more detailed settings as I set up each service.

Every tab has a link to an overview of that specific service, and it’s worth reading those.

Instances

Instances are the virtual private servers (VPSs) you’ve created. A VPS is a type of virtual machine, with the full instance of the OS installed, running in a multi-tenant environment. If you’ve created any VPSs, they will be listed on the main page.

To create an instance, you can choose the OS (Linux or Windows). With Linux you can stick with the base OS, or choose one of the prepackaged applications such as WordPress, GitLab, Joomla and more. As you select the OS or prepackaged application, the prices are displayed at the bottom of the page.

Windows Instances have the OS or SQL Server Express (2016 or 2019) as the options. Note that SQL Server is a Lightsail Instance and not a Lightsail Database. Lightsail Instances manages EC2 and AMIs behind the scenes. Click on the images below for a larger view.

You can choose different instance sizes, and set a few options for both the instance and the prepackaged application. I’ll dig into one or two of these in future posts.

Containers

Lightsail Containers are built on ECS, and can use Docker containers from any public registry or pushed from your local machine. Access to these containers should be though either the Lightsail endpoints or a custom domain you configure in Lightsail.

Databases

Lightsail databases can be either MySQL or PostgreSQL (Lightsail does have an option for SQL Server Express hosted on Windows, but that is set up as a Windows Lightsail Instance, not as a Lightsail Database, see the Instances above). There is a lot of documentation about database parameters, importing data, snapshots and so on. You can use your favorite database tool for managing your databases, but you have to put them into Public mode, it does not appear that SSH tunneling is an option at this time. You could probably set up another Instance with phMyAdmin (or similar) and there is a cpanel option in Instances, but cpanel requires a paid license.

Networking

Networking is where you can configure a static IP, load balancers and a CDN. You can have up to five static IPs attached to instances at no cost. The load balancer supports both HTTP and HTTPS, but HTTPS requires you to obtain an SSL/TLS certificate via Lightsail (see https://lightsail.aws.amazon.com/ls/docs/en_us/articles/understanding-tls-ssl-certificates-in-lightsail-https).

Storage

Lightsail Storage is either Bucket (built on S3) or Disk (built on EBS). I will look deeper into Bucket in the next post. There does not appear to be an option to attach existing S3 buckets or ESB disks to a Lightsail application. In Bucket storage, 250GB is the max storage you configure, although for an “overage fee” it looks like you can exceed this. That’s not a lot for space for what S3 gets used for in general, but for what we’re doing in Lightsail that should be pretty good, and you can have more than one bucket. You can configure up to 16TB of Disk with the Custom option, but at $1 for 10GB that will run about $1600/month.

Domains & DNS

Domains & DNS is where you can register a domain name and manage its nameservers, If you already have a domain name you can use it and just configure the DNS Zone. For domains registered elsewhere, you can use external nameservers, but its recommended to use Lightsail’s DNS.

If you register a domain name via Lightsail, the DNS zone is automatically configured. The TLDs available to register are listed at https://docs.aws.amazon.com/Route53/latest/DeveloperGuide/registrar-tld-list.html#registrar-tld-list-index-generic, and the price varies based on he TLD.

Lightsail DNS is built on top of Route 53, but supports only A, AAAA, CNAME, MX, NS, SRV and TXT and record types, These are the most common record types for web applications. If you need other record types, you can use Route 53 instead. You can have up to 6 DNS Zones (one per domain name) at no cost.

Snapshots

Snapshots are backups of Instances, and are configured on the Instances tab.

Summary

That’s the tour of the Lightsail control panel and some of the configuration pages. I’ll look deeper into some of these in future posts.

Series Contents

Side Project Chronicles, ep. 1: Hosting

Side Project Chronicles, ep. 2: Tour of the Lightsail Control Panel (this post)

Side Project Chronicles, ep. 3: Lightsail Bucket Storage

Side Project Chronicles, ep. 1: Hosting

It’s been a long time since I’ve written my own thing from the ground up. How long, you may ask? Since shared hosting was the only game in town other than colo. That’s a long time. Shared hosting was great. Someone else took care of the servers and networks and firewalls, you were only responsible for the code. I’ve missed tinkering around on side projects, no matter how ridiculous they become and even if they amount to nothing. So it’s time to tinker a little.

There are plenty of shared hosting services around, and they’re great (this blog is hosted on one, as are a few other sites I maintain). But I wondered, can I replicate the shared hosting model in AWS? Or get close? I’ve built some pretty big APIs and data services in AWS, but I’ve never really explored the website hosting aspects. As an AWS Community Builder (curious, check out https://aws.amazon.com/developer/community/community-builders/), we get credits to do exactly this type of tinkering. I’d also like to use AWS because I may want to expand into trying other services. And, IaC if possible, probably Pulumi since it also supports C# and Python. I know a tiny amount about Pulumi, but YOLO.

The stack I want to use is .NET Core, Windows or Linux (doesn’t matter any more with .NET), a relational database but not I’m not partial to MySQL or PostgreSQL, since SQL Server is very difficult to host properly in AWS. Again, I’m more interested in the tinkering with code than the hosting aspects, so I want as much managed as possible. Just like old times.

AWS has an overview of its website hosting options at https://aws.amazon.com/websites/. I won’t be using static pages, so I can eliminate S3 as an option. Since I want to use ASP.NET server side scripting, that eliminates Amplify, so Amazon Lightsail it is. Of course it can run containers, which weren’t a thought until now.

Lightsail is not as well documented as other AWS services. There is a documentation mini-site at https://lightsail.aws.amazon.com/ls/docs/en_us/all, but also some courses on Cloud Academy (https://cloudacademy.com/search/?q=lightsail). I’ll have to check these out, Cloud Academy has good content and AWS CBs have a complimentary subscription. The documentation makes Lightsail a bit of an enigma, and makes me a little hesitant that this service is only half-baked, but hey, sometimes it’s about the journey.

Lightsail has a lot of cool capabilities. I’ll be running either a virtual private server (VPS) or a container. As with shared hosting services, it has some preconfigured applications like WordPress, GitLab, Plesk, Drupal, Ghost, Joomla and more (see https://aws.amazon.com/lightsail/features/). MySQL and PostgreSQL are available, plus block and object storage. The object storage is based on S3 but is simplified (ref. https://lightsail.aws.amazon.com/ls/docs/en_us/articles/buckets-in-amazon-lightsail). For scaling, there is a CDN and load balancers which can be added on later.

This is clearly going to be a series, posted at irregular intervals, but there is a lot to look forward to tinkering with in Lightsail.

Series Contents

Side Project Chronicles, ep. 1: Hosting (this post)

Side Project Chronicles, ep. 2: Tour of the Lightsail Control Panel

Side Project Chronicles, ep. 3: Lightsail Bucket Storage

Can a customer managed IAM policy override AWS managed IAM policies?

Introduction

Writing custom IAM policies can be difficult, especially when job function utilizes bunch of services.  AWS manages several IAM policies for particular job functions (such as data scientist), which are a great help, but what if we want to restrict access to certain services all together, or certain actions, or even specific buckets?

A common pattern in lake house architecture is to have an S3 bucket of raw data, a process to tokenize/scrub the data of sensitive information, and then a “cleansed” bucket with cleansed data that can be used in analyses.  The AWS-managed DataScientist job role policy is complex, and we’d prefer to use that as our base policy but put additional restrictions on it.  The question became, can we simply attach an additional policy to a role and have it override some of the settings in the AWS-managed policy?  As it turns out, we can.

Tighter Restrictions

The first question we had was, can we make restrictions tighter than an AWS-managed policy by adding one of our own?  Here’s what I did.  I first created a user, with only AmazonS3FullAccess, which allowed me to access all objects in all buckets.  I then created the following policy and attached it as an inline policy to my test user.

The results were exactly what I wanted to see—no ability to list the objects in the bucket.
image

I repeated this experiment, but this time creating and attaching the a customer-managed policy.  The result was the same—the user could list the bucket’s objects when my custom policy was not attached, and could not list the objects when the policy was attached.

Looser Restrictions

The second question we had was whether or not we could loosen restrictions in an IAM-managed policy by attaching one of our own.  To test this, I used the same user as above, but removed all policies, and then added AmazonS3ReadOnlyAccess.  Then, I confirmed a folder could not be created:

image

I then created a policy which allowed PutObject, attached it to the user, and confirmed I could now create a folder:

image

So again, a customer managed policy can override an AWS-managed policy.

Conflicting Policies

So then we wondered, what happens if you attach conflicting policies.  So I attached both AmazonS3ReadOnly and AmazonS3FullAccess to my test user:
image

I could once again create a folder:
image

This isn’t surprising, since explicit permissions overrule implicit permissions.  One final question we wanted to test was what happens with two explicit permissions—one allow and one deny for the same action.  I created two policies–one which explicitly denied listing buckets, and one which explicitly allowed listing of buckets–and attached them to the same user one at a time.  After confirming they worked as intended when attached individually.

image

image

When attached together, the explicit deny overrides the explicit allow.

image

Conclusion

Customer-managed policies can be used to override actions when implicitly allowed or denied in AWS-managed policies.  This means we can make use of the complex AWS-managed IAM policies and still have the ability to make some modifications when needed.

AWS describes the order of evaluation at https://docs.aws.amazon.com/IAM/latest/UserGuide/reference_policies_evaluation-logic.html.  The results here are in line with the logic described—we could allow an action which wasn’t explicitly denied, but an explicit deny took precedence over an explicit allow.

Creating folders and listing objects are easy tests, but they’re not the full story.  It would merit some deeper investigation into individual actions before concluding all actions behave the same way.  Also, this emphasizes the need for specifically and carefully defining the actions you want to allow or deny.

Preview Review: AWS Outpost Micro Appliance

I recently had the opportunity to review a forthcoming AWS Outpost Micro appliance and was asked to provide feedback.  The review was uncompensated, and the device had to be returned, so my agreement was that when a more public release approached I could put my thoughts into a blog post, and here we are.

The AWS Outposts family (see https://aws.amazon.com/outposts/) is a category of appliances which extend the AWS cloud into on-premises data centers.  They come in a variety of configurations to suit corporate workloads.  Although the Outpost Micro is part of the Outpost family, its capabilities and resources are scaled to the power smart home user.

Even in its preview form, the Outpost Micro showed a lot of potential.  The second generation prototype I used has 4 CPU cores and 16GB RAM, plus a bunch of storage (see below).  The Outpost Micro does not support services such as EC2, EFS, EBS, SES, etc.  This also means services like API GW and GWLB which have a reliance on EC2 are not available.  For a couple of these services that’s OK, ISPs usually have provisions about hosting websites from home which the API gateways would allow you to do.

The preview appliance did support S3, Lambda, ECS, DynamoDB, SNS, some IoT services, EventBridge and Fargate.  Most compelling was the S3 media streaming.  As mentioned above, the Outpost Micro is designed for smart home storage and computational workloads, so there was seamless integration with FireTV devices.  Forthcoming features include integration for local Alexa skills, integration with Echo Show and Ring devices.

If you’re familiar with developing for AWS services, you can also deploy your own applications to your device.  I was able to set up some Lambda functions and do some data processing in a local environment similar to what I do at my day job.  I did not have it long enough to set up Octoprint and drive a fleet of 3D printers but maybe when I get a real one.

Since you always need an architecture diagram to make anything official, this is basically how the Outpost Micro connects to AWS:

micro

As with Kindle and Fire devices, the Outpost Micro is factory configured with your Amazon account, so you just connect it to your network router, turn it on, and hit the config page from a laptop (mobile app coming soon).  The appliance uses a Customer Gateway VPN to extend your AWS account on-prem into your own home; other outposts directly extend VPC but this is designed as consumer device and is somewhat self-sufficient.  The Customer Gateway is technically part of the appliance and isn’t something you need to set up yourself aside from some initial setup wizard and T&C acceptances.

Since I had the device during sports season, I decided to see how I could extend the device beyond my home.  The power outlet in my Honda Pilot was not sufficient to power the device, but my buddy’s Ford pickup could power it, and when coupled with a small wifi router had a portable LAN which the kids loved on a couple long sports trips for media and gameplay.  Other cars stayed within portable wifi range so the rest of the team could participate.  Thinking back to the LAN parties of old, this is happily similar in concept but almost absurd in its portability.

The OM device has limited access to the rest of your home’s network, so it isn’t suitable as a print server or media server for something outside of the AWS fleet of devices and apps.  After some begging and arm twisting, learned my device had about 20TB of storage but final versions may have more or less or the same.  This isn’t a 20TB NAS, the storage space is partitioned and used across services, so you may only have 5TB of extended S3 and any overflow is in AWS cloud.  It’s clear this is meant to be a cloud-connected device with local cache serving edge computation and streaming needs.

I miss my old Windows Home Server, but with a little config (and in the future, some apps) the Outpost Micro is an exciting piece of home technology.

For more information or to sign up for the next round of preview, click here: https://bit.ly/2ObV8Lh

Data Prep with AWS Glue DataBrew

Scenario

Now that we’ve had our first look at AWS Glue DataBrew, it’s time to try it out with a real data preparation activity.  After nearly a year of COVId-19, and several rounds of financial relief, one interesting dataset is that from the SBA’s Paycheck Protection Program (PPP).  As with al government programs, there is a great deal of interest in how the money was allocated.  The PPP was a decentralized program, with local banks approving and disbursing funds.  The loan data for the program was released in several batches, and early indication is that the data is a bit of a mess, making it difficult for groups without a data prep organization to analyze the data.  As data professionals, we can help with that.

Setup

The link to the most recent PPP data is available is found at https://www.sba.gov/funding-programs/loans/coronavirus-relief-options/paycheck-protection-program/ppp-data.  I downloaded the Nov 24, 2020 dataset, and uploaded the files to an S3 bucket.

Our work with DataBrew begins, as  many things in AWS do, by creating a service level IAM role and granting permission to our data, as documented at https://docs.aws.amazon.com/databrew/latest/dg/setting-up-iam.html.

After we’ve uploaded our data and given DataBrew permission, it’s time to create a Dataset, which is basically a pointer to the data files we’ll be using.  We’ll need a Dataset for every different batch of data we want to use.

image

Initial Profiling

The first thing I like to do when I get an unknown dataset is profile as much of the data as I can.  With DataBrew, I can easily set up a Profile Job to gather statistics about the entire dataset.  To start, we navigate Jobs >> Profile Jobs >> Create Job.  The configuration looks like the image below.

image

The profiling job takes a little over one minute to run since DataBrew will profile a maximum of 20,000 rows even if you select “Full dataset” (you can request a limit increase).  Once complete, we can choose to “View data profile”, then the “Column Statistics” tab to check for completeness, type and validity.

Most of the columns are 100% valid, which would be fantastic if true, although I suspect unknown values may be represented by a value which DataBrew does not recognize as “unknown” or “invalid”.  We’ll need to investigate further.  Also, ZIP Code was identified as a numeric column, which is a very common mistake made by data profilers.  Many US Zip Codes start with zero, and need to be treated as strings in order to retain that leading zero.

image

State claims to be 100% valid, so let’s take a look at the values.  Of the 20,000 records profiled, all were in Kansas.  Deep sigh.  We’re going to need to try a random sample somehow.

image

Cities are where the fun usually begins, and looking at the Top 50 values, we see that there is inconsistent casing and DataBrew treats “OLATHE” and “Olathe” differently. We see the same treatment with “LAWRENCE” and “Lawrence”, too.  That’s something we can try and fix in our data prep.  Trivia note: “Pittsburg” is spelled correctly here, only Pittsburgh, PA has the “h” at the end.

image

Random Sampling

That’s a good start, but let’s see what else we can find with a random sample.  To do a random sample, we need to create a project, using the same dataset, and configure the sampling to be 5000 random rows.

image

After the sampling is complete, we’re taken to the projects tab, where we can review the sampled data.  Right away we can see that “Not Available” and “N/A” are very common answers, and we need to work with our business partners to decide if these are values we want to count, values we want to convert to a different value, or if we want to count them as invalid results.

1-6a-sample

Looking at some of the ZIP Codes, we can see that the column was profiled as a number, and some of the MA ZIP Codes lost their leading 0.  We’ll need to change the column type and put the leading 0 back using a transformation.

1-8a-sample

Looking at the State column, the random sampling did improve the sample somewhat—we now have 5 states represented instead of just one.

1-8b-sample

Recipe

Now that we have a couple columns which need a transformation, and a decent random sample, it’s time to start create our first recipe.  We’ll clean up both the ZIP Code and City name column and let our business users work with the data while we look for some additional transformations.

ZIP Code

Since ZIP Code was incorrectly typed as a numeric column, we need to correct this before we produce an output for our users.  This means we need to re-type the column as a string and pad the leading zero where it was stripped off.

To change the type of the column, click on the “#” next to the column name and choose “string”.  This will add a recipe step to convert the type of this column, but will not replace the leading zero.

image

In order to replace the leading 0, we can rely on the old trick of prefixing every value with a 0 and take the right five characters to create the full zip code.  This is a two-step process in our recipe.  First, we pad all values with 0 by activating the Clean menu, selecting “Add prefix…”, then entering a prefix text of 0.

image

This prefixing will be applied to all values, which will make most ZIP Codes six characters long.  To fix this, we take the right five characters by activating the Functions menu, selecting Text Functions, then Right.

image

This operation will create a new column, which by default is labeled “Zip_RIGHT”, and we configure the number of characters to keep.

image

And when we preview the change, this is how it looks.

image

City

As we saw in the profile results, city names are both mixed case and all uppercase, which is causing mis-counts by city.  We need to standardize the capitalization to alleviate this.  For our needs, it doesn’t matter if we use all uppercase or not, just as long as we’re consistent.  I’ll use proper case because it doesn’t look like I’m being yelled at.  We can either activate the Format menu (either from the menu bar or using the ellipses menu) then choosing “Change to capital case”.  

image

We can then see an example of what each formatting option will do.  Capital case is the closest option for how most city names are capitalized.  It’s not perfect, but it’s consistent, and we’d need an address verification system to do better.  This option changes the value in the original column, it does not create a new column.

image

We can even preview the changes, and see how ANCHORAGE and Anchorage are now combined into a single value of Anchorage.

imageimage

Our recipe now looks like this, which is good enough for now.

image

Publishing and Using the Recipe

In order to run this recipe against the full dataset, or to run it again, we need to publish it and then create a Job.  From the Recipe panel, we click the Publish button.  Recipes are versioned, so in the pop-up we add some version notes and Publish.  Once Published, we can use it in a Job.

image

I covered Jobs in detail in the First Look: AWS Glue DataBrew, so here is how I configured the job:

image

Parquet is a great storage format, it has a schema, it’s compact, columnar for performant query, and it’s native to many of AWS’s services.  Once the job has completed, how do we ensure it worked?  Simple, we use the output as a new Dataset and profile the results.  Viewing the results of the profile of the cleanup job, we can see the top 50 City names are all capital case.
image

Similarly, we can see the ZIP Codes are all 5 characters long and have the leading zero (fortunately, the profile job sampled New Jersey).

image

Congratulations, we can now start to make this data available to our users!  We know they’ll find more steps we need to add to our recipe as they begin to work with the data, but this is a great start.  Find me on Twitter @rj_dudley and let me know how you find DataBrew.